Looking to add some cool tracking effects to your sports reels? Check out this technique in After Effects.
Baseball season is upon us, and as such, you will likely see cool shots like this one. Is this a specialized camera that can track moving balls at high speed? Not so much; this is very much a post-production technique that is very easy to replicate in After Effects. So, if you’re filming amateur sports or want to create highlight reel content for your favorite team, this technique is just for you—no matter the sport.
However, I do need to note that we’re using 4K footage for a 1080p social post. It is paramount to use media larger than the intended social post: 4K is good, 6K is better, 8K is fantastic (you might not even have to do the second part of this tutorial), and 12K, well, aren’t you fancy?
Tracking in After Effects
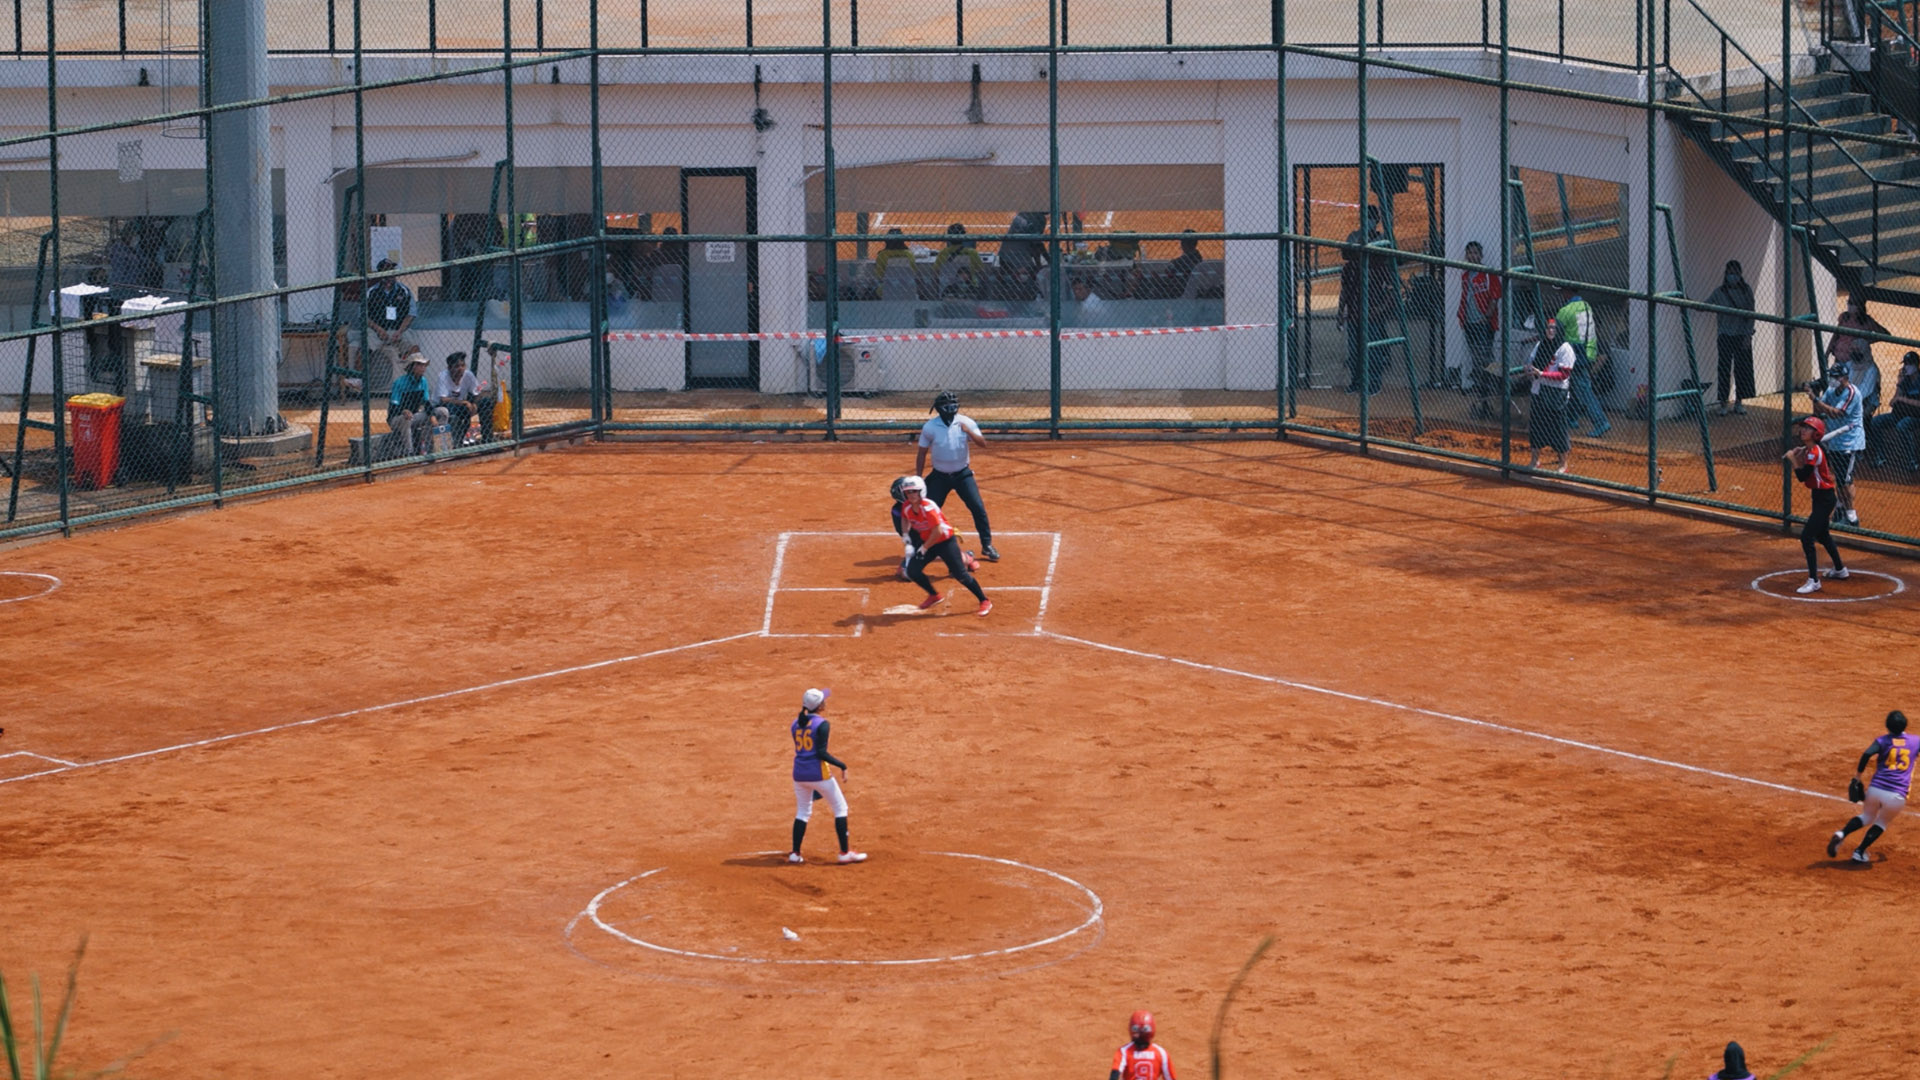
With that, let’s get started in Adobe After Effects. I have this video clip of softball, which I downloaded from the Videvo library. The pitcher pitches the ball, and then, presumably, the batter knocks it deep into the field, with everyone watching the ball fly. This is a cool little shot, but we can add some flair by zooming in and following the ball.
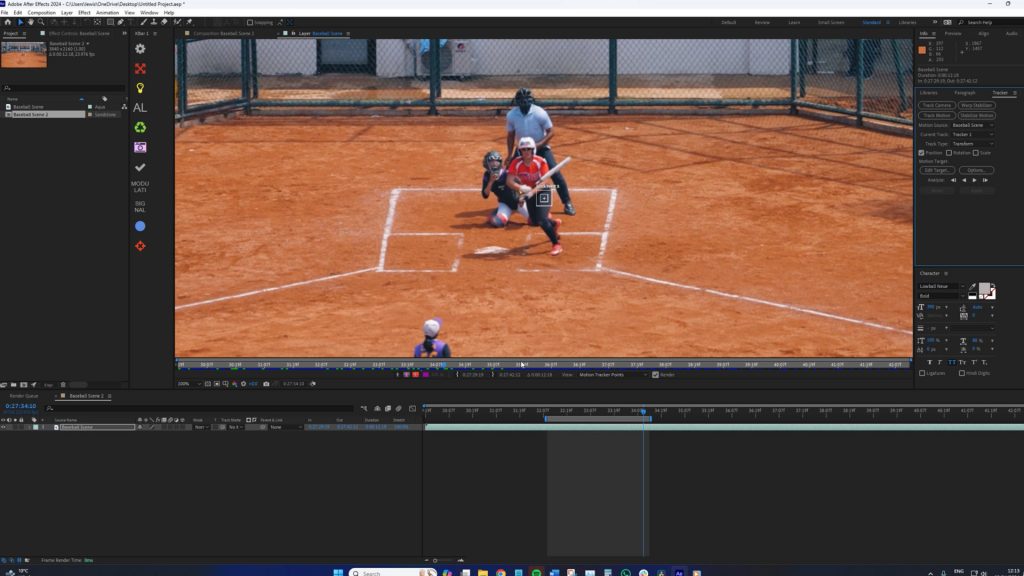
First, we want to isolate where the camera track will occur. In this particular shot, I’m looking at following the ball from the moment the pitch is released until the ball flies out of frame. To do this, let’s double-click our footage to bring it into the layer window and then select the tracking tab. Here, we are going to select “Track Motion.”
Now, for some bad news. The problem with 24fps footage and incredibly fast-moving objects like a baseball or softball is that they leave nothing but a motion trail of color. It’s not wholly ideal for tracking an object. In fact, if I place this over the ball and click track forward (see video), you can see it doesn’t latch onto the softball at all. So, we are going to have to track this pitch and hit it manually. However, the good news is that given the speed of pitches and the exit velocity of hits, this manual tracking will not take long because the ball is only in view for two seconds at most.
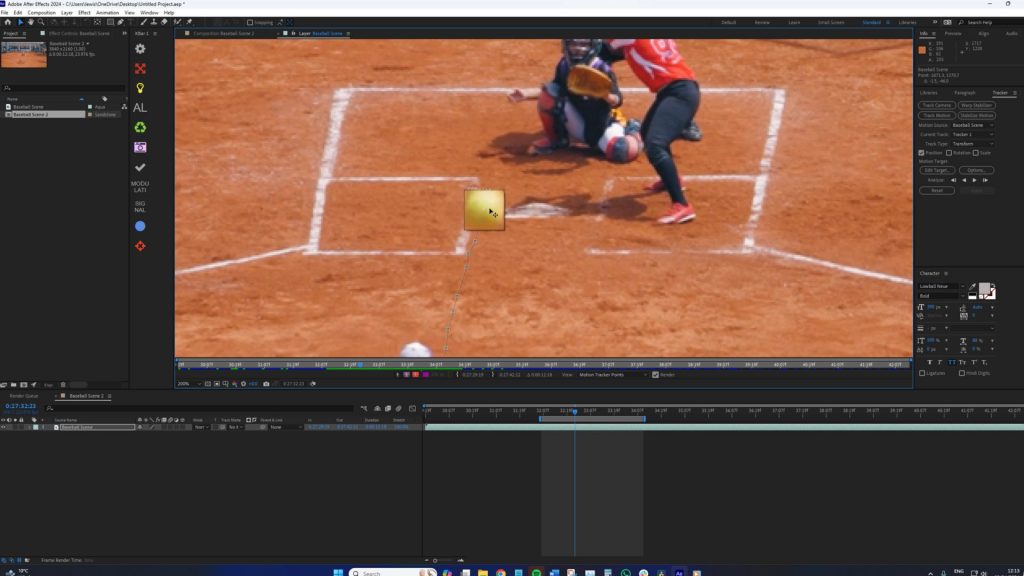
Cue tracking montage.
With the tracking complete, I’m going to add a new null layer and then a new camera. In the tracking window, I’m going to edit the object to select the null, and then hit apply. When we open the null object layer properties, we can now see the tracking points, but only for the portion where the ball is in flight — which is what we want.
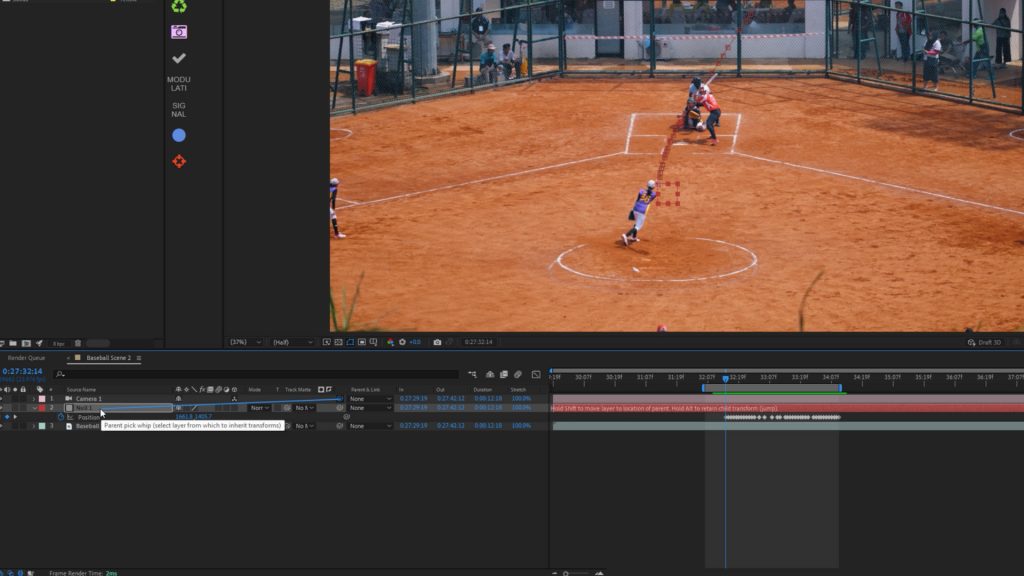
Next, we need to parent the camera to the null object. When you hit play, you’ll note that nothing happens. This is because we now need to change the footage layer to 3D. Upon doing so, the camera locks onto the ball with great effect. However, and it’s a big one, the footage now falls out of frame because we’re centering the ball. This does not look good. But this is where the comfort of posting to social media, which generally requests 1080p footage, comes into play.
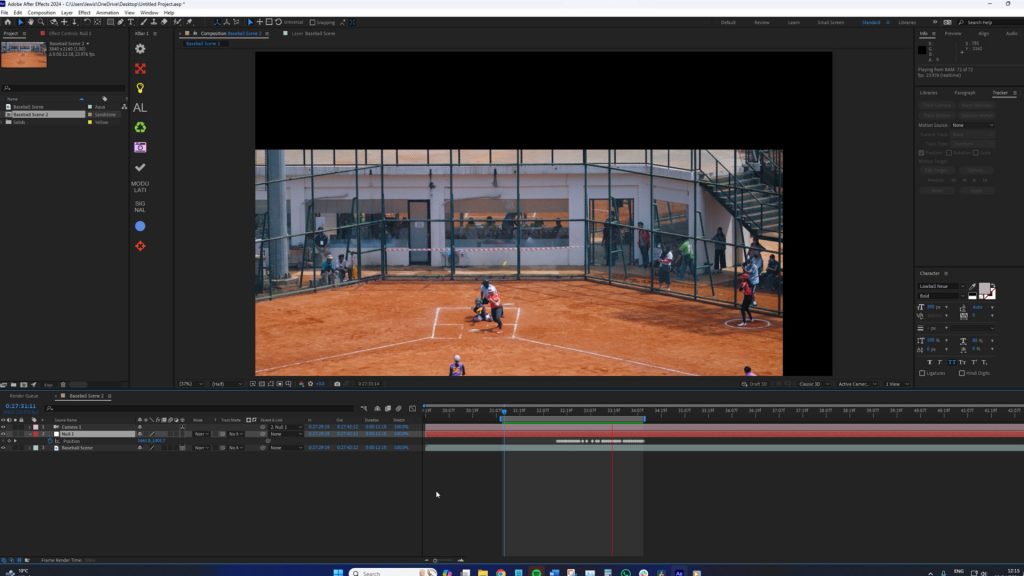
Therefore, we should decrease the composition size from 4k to 1080p, and we should scale down the footage layer so it fills the composition. Then, just as the pitcher pitches the ball, we can snap zoom in. We want to leave the null object and camera layer alone but instead, set keyframes for the scale and position of the footage layer.
You can choose how much you zoom in, but the more you zoom in, the greater the effect of following the ball. A few frames before the ball is set to be released, activate the position and scale keyframe. Then, move a few frames in and scale your footage back up. This, in turn, creates a zoom effect.
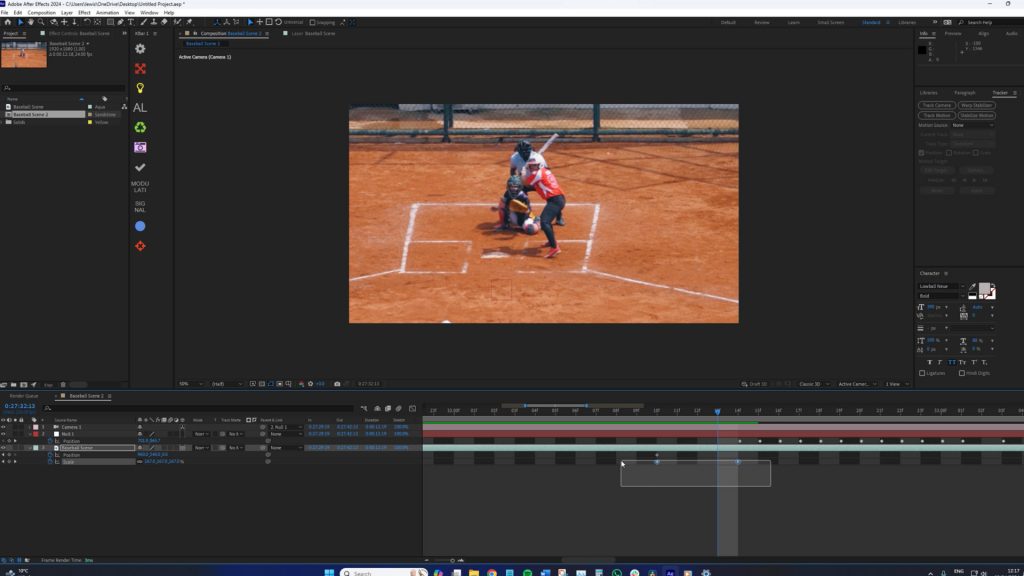
I recommend making the transition an easy ease keyframe, which you can do by selecting the keyframes and holding F9. If you turn on motion blur for the footage layer, it also adds the element of speed to the movement. You might ask, why have we also set a position keyframe, considering we have a 3D camera doing the movement? This position keyframe is to clean up the possible blank space creeping into view as we camera-track throughout the shot. Since we’re only slightly nudging the position placement a touch because we have decreased the scale, it shouldn’t be noticeable in the slightest.
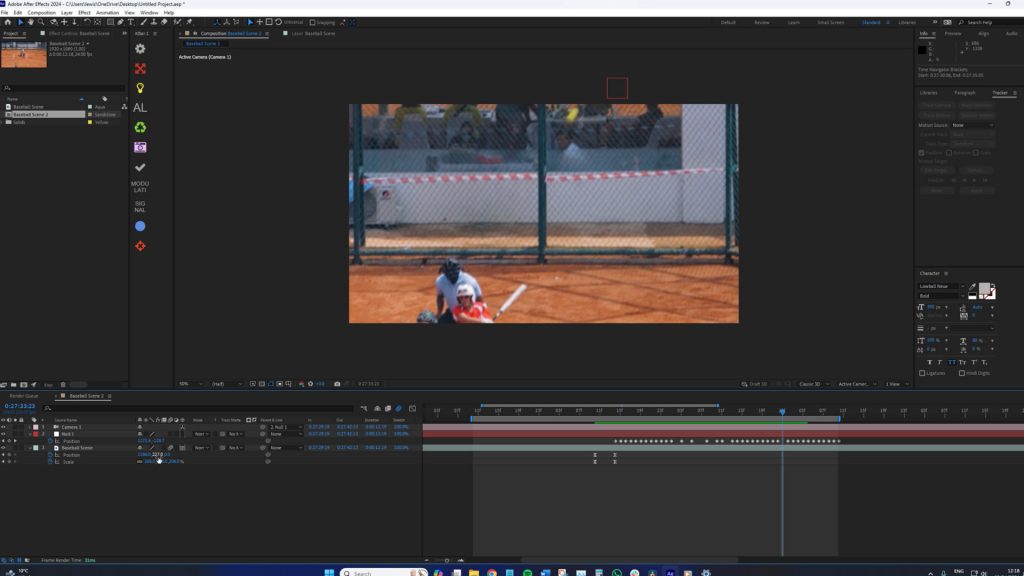
At the end of the sequence, you can either cut back to the full composition or do another crash zoom, but in reverse. Either way, the result is great! (See video.)
As we wrap up this tutorial, it’s evident that creating dynamic, professional-looking sports footage isn’t just the domain of high-end cameras and specialized equipment. With a little ingenuity and mastery over Adobe After Effects, even amateur videographers can produce content that stands out on any platform.
Looking for filmmaking tips and tricks? Check out our YouTube channel for tutorials like this . . .
