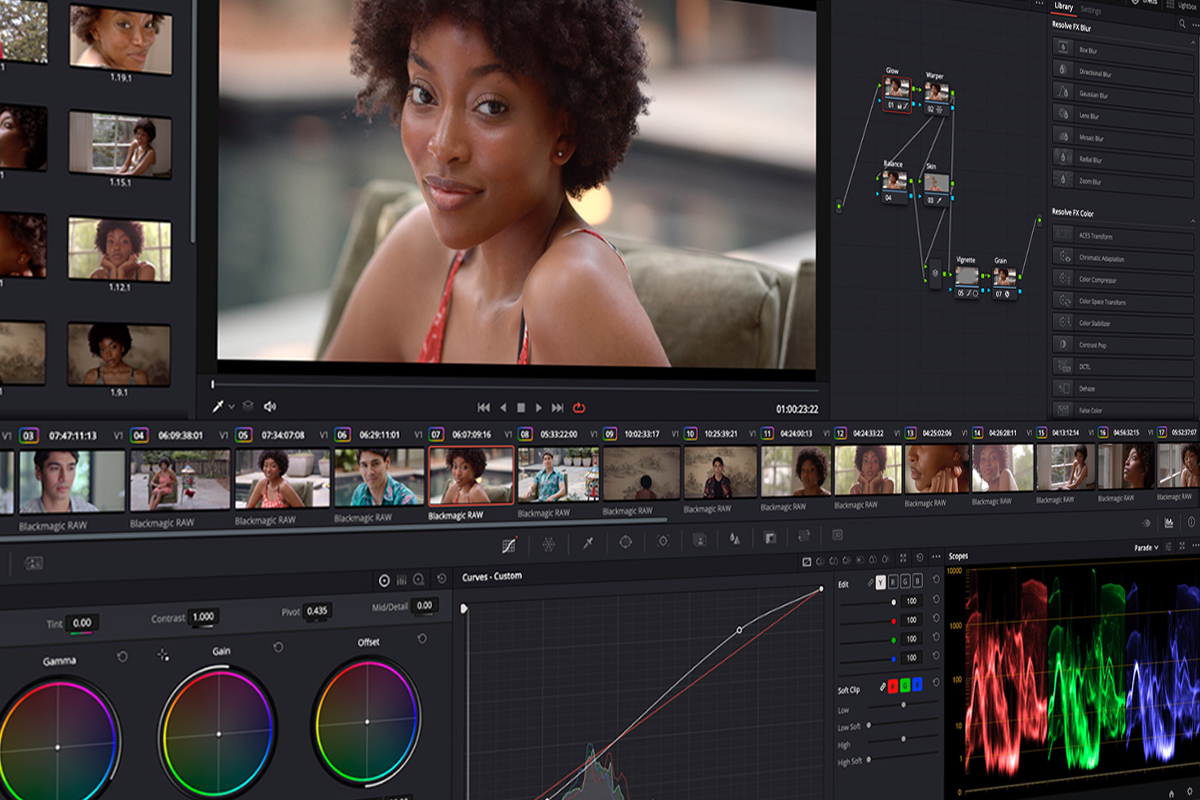
If you’re ready to start editing in DaVinci Resolve, these are the 9 shortcuts you need to know.
Of the various video editing applications out there, none are quite like DaVinci Resolve. First of all, the Blackmagic-made editor is free to use. While this free version isn’t as robust as the premium version, it’s still incredibly generous with its features. And unlike many other non-linear editing (NLE) applications, Resolve is an all-in-one program that combines video editing, visual effects, color grading, and audio editing into one platform. With Resolve, there’s hardly any reason to use additional apps for your video editing workflow. (The flip side of such an expansive piece of software is that it can be challenging to learn.)
Though it may not seem like it, Resolve is not impossible to learn, especially if you know your way around a keyboard. With a few basic keyboard shortcuts, you can quickly make your way through an edit in Resolve.
1. Marking
Rather than moving the entire clip to the timeline and then trimming it down, marking is how you select a specific section of a clip to move to the timeline. The most basic way to mark is by using the “I” key to mark an in point and the “O” key to mark an out point. If you made a mistake and need to clear the marks, you can use the “Alt + X” shortcut to remove both the in and out points. However, you can use “Alt + I” and “Alt + O” to remove either the in or out point, respectively.
Since you’ll be marking a lot, it’s worth knowing a few more advanced shortcuts. For example, if you only want to mark the video portion of the clip, you can use the “Alt + Shift + I/O” shortcut. And if you want to select audio only, the shortcut for that is “Ctrl + Alt + I/O.” And you can use “Alt + Shift + X” and “Ctrl + Alt + X” to wipe the points for just the video or audio, respectively.
If remembering all this is too much, Blackmagic does sell editing keyboards with the shortcuts baked in (see below).
2. Playing in to out
This shortcut is closely related to the previous one. It lets you watch only the marked portion of a clip from the in point to the out point, which is a huge time saver when reviewing longer clips. You can do this by hitting “Alt + /.” You can also play a clip until the out point by using the “Ctrl + Alt + /” shortcut.
3. Delete vs. Ripple Delete
As you make your edits and review, you may notice a clip is no longer working. The obvious choice is to hit the delete (Del), but that does a ripple delete, which collapses the timeline to fill in the gap left behind by the deleted clip — you can also ripple delete by using “Shift + Backspace.” While this can be useful, ripple delete can be complicated if you have multiple video tracks on your timeline since it can shift other video tracks where you don’t want them. The better choice is to hit the “Backspace” key, which removes the clip and leaves the rest of the timeline untouched.
4. Cutting a Clip
Alternatively, you can also use “Ctrl + X” to remove a clip by cutting it, allowing you to paste it somewhere else on the timeline. Cutting is the way to go if you need to rearrange the clips. If you want to do a ripple cut, the shortcut is “Ctrl + Shift + X.”
5. Nudging
Using the “,” and “.” keys, you can nudge the timeline one frame backward or one frame forward. Nudging will move the selected clip into the space of other clips, which shortens those clips. However, if you want to move the cursor, not the clip, you can use the left and right arrow keys.
6. Retime Controls
Using “Ctrl + R” will instantly bring up the retime controls for the selected clip. If you’re unfamiliar, Retime controls allow you to speed up or slow down a clip. It’s useful if you’re trying to speed up a long clip to make a timelapse, or if you’re slowing down a clip for a slow-motion shot. With retime controls, you can also break up a clip so that certain parts play at either normal, slow, or fast speed.
Of course, you’ll have to use clips with a higher frame rate than your timeline’s frame rate to get smooth slow-motion shots, but it can still look good if you don’t slow it down too much.
7. Going Fullscreen
When reviewing your timeline, it’s a good idea to go full-screen to spot minor details. You can do this by pressing the “P” key. Doing so will launch either the selected clip or timeline into full-screen. The playback control window disappears after a couple of seconds, giving you a clear look at your video without any distractions.
8. Creating a New Node on the Color Page
The color page is one of the best reasons to use DaVinci Resolve. It’s so good that professional colorists use it to color-grade your favorite TV shows and films. The color page is unlike the rest of Resolve and has a distinct way of doing things. Rather than using layers like other NLEs, the color page works on a node system.
While the number of nodes can vary for each clip, you’ll need more than one node to apply your color edits. There are several different nodes, but the most common is the serial node, which adjusts the preceding node. You can use “Alt + S” to create a new serial node.
9. Toggling Nodes in the Color Page
Each person has a different style when it comes to color-grading. It’s not uncommon to have up to a dozen nodes for a clip. That can quickly get complicated as you try to make minor adjustments, but you can turn off all the nodes using the “Alt + D” shortcut. Alternatively, using “Ctrl + D” will toggle a single node.
We hope that you enjoyed this list of the basic DaVinci Resolve Shortcuts that you need to know – bookmark this article to keep them handy! And if you are still just getting started with DaVinci resolve, here are some FAQ’s about this video editing software:
Is DaVinci Resolve actually free?
Blackmagic, the creators of DaVinci Resolve, believe that fantastic video editing should not be reserved for Hollywood. This is why DaVinci Resolve is offered for free and with very similar features to its paid version. In the actual words of its creators, you can download the free version of DaVinci Resolve to get started, and once you need more advanced features, you can purchase DaVinci Resolve Studio.
Is DaVinci better than Premiere Pro?
Both softwares offer pros and cons. For starters, Premiere Pro is a fully-paid software, while DaVinci Resolve is available for free. Some editors argue that DaVinci Resolve is more robust in terms of editing capabilities, overall performance, and file format flexibility and support. Others state that Premiere Pro offers an easier learning curve and is overall simpler to use.
How much does DaVinci Resolve cost?
DaVinci Resolve is free to download and to use. DaVinci Resolve Studio, the paid version of this video editing software, costs a one-time payment of USD $295.
Can DaVinci Resolve run on 8GB RAM?
Blackmagic recommends having a RAM of at least 8GB to run DaVinci Resolve. It goes without saying that the higher the quality and size of the files you are working with, the more it is recommended to go with at least 16GB of RAM to enjoy a smooth editing experience.
Cover image via Blackmagic Design.
Looking for filmmaking tips and tricks? Check out our YouTube channel for tutorials like this . . .
Looking for more tips and tricks? Check out these articles . . .


